
Setting up an Azure DevOps Server Integration
The Azure DevOps (ADO) server integration with ProdPad uses a window service TFS ProdPad to mediate between a TFS server and ProdPad. There are several parts to getting the ADO integration for ProdPad set up:
- Install and set up TFS ProdPad windows service
Download the .zip file here - Create a new integration within ProdPad for ADO server
Prerequisites
- ProdPad Advanced subscription or above
- ADO server
- .NET Framework
- Optional SSL certificate
- Open/public port suitable for SSL connections (the default is port 443, otherwise we recommend ports 9000-9002)
Install and set up the ADO ProdPad windows service
The ADO ProdPad service manages login to the ADO server in two ways:
- Username & password
- Impersonation
Username & password
With the username & password, each user that needs to interact with the ADO server from ProdPad will need to enter their username and password into the ADO ProdPad service panel to generate a unique key. The ADO ProdPad service will then use the username/password to create item & update items in the user’s name.
Impersonation
With impersonation, a single username & password needs to be entered which has access to the ADO service. Each user who needs to interact with the ADO ProdPad service will have their ADO username entered into the ADO ProdPad service panel which generates the unique user key for ProdPad. ADO ProdPad service will then use ADO's impersonation feature to create and update the work items in the user’s name.
For this approach to be used ADO impersonation feature needs to be enabled on the ADO server. You can read more about impersonation here.
Additionally, the proxy account needs to have permission “make requests on other's behalf” set. Follow the instructions in the section “Setting Permissions for Proxy Account” below to set this permission.
Note:
ProdPad ADO Web API is a windows service. It does not require IIS. You can self-host a web API in your own host process.
Set up process
- Run ProdPadTFSWebAPISetup.exe and install it
- Open Start > ProdPad TFS API > ProdPad TFS API Control Panel

- Specify a secured port number you intend running the Web API Service (the default is port 443, otherwise we recommend 9000-9002 but if you require a different port and this port needs to be in your base URL please let us know).
- Check "Is Https" option if you wish to have ProdPad connect to the TFS ProdPad service using SSL.
Note: You’ll need to have a valid SSL certificate for the server the TFS ProdPad service is running on if you use this option. - Enter Team foundation server’s local URL. Click on Test connection to try it.
- Click Save
- Note down the "ProdPad Key"
- Open tab User Accounts to manage TFS users

nb: If you wish to edit existing users, you can edit their domain, username and password in grid by double-clicking on cell and clicking Save button under the grid.
nb. If you wish to delete an existing user, select its row, press delete key and click Save
- Did you enter at least one user with the option "Log on" checked?
- Are the "Log on" account's credentials correctly entered into the user accounts tab?
- Does the "Log on" account have valid permissions?
- Is windows service running under valid TFS account? ProdPadTFSWebAPI service must run under account with valid TFS permissions. You can apply such account in windows services panel properties
- Still having issues? Please check the troubleshooting section below for other possibilities
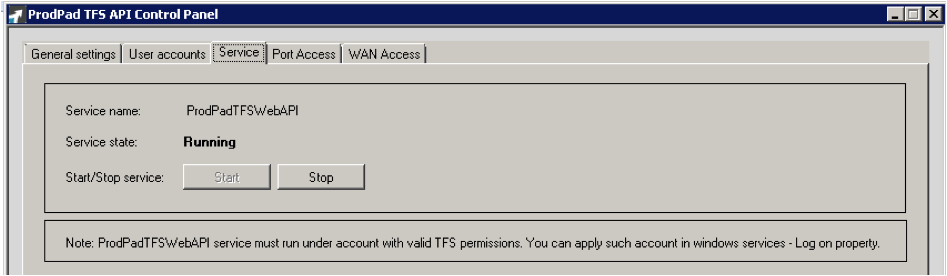
- Click Start
The TFS ProdPad service has now been installed and the security tokens (ProdPad Key & ProdPad User Key) have been created for use in the final part of the setup.
If you wish to check your Port and WAN access go to tabs Port Access and Wan Access in the TFS ProdPad service panel. Port Access tab will check if selected Web API port is opened and WAN Access tab will check if Web API is publicly available through this port!
Here is a video of the setup process as an additional reference should you need it:
Video: TFS Set up process
Creating Integration within ProdPad
This part sets up ProdPad so it knows when to send the information when you push an idea or user story.
- Click on Integrations menu option in ProdPad
- Click on the "ADO" option to start the creation process.
- Fill in the form adding in:
- the name for the integration
- the URL that the ADO ProdPad can be accessed at (if this base URL specifies a port outside of the range 9000-9002 please let us know)
- the Prodpad Key value from the TFS ProdPad service to the TFS API Key field
- the Prodpad user key value from the FS ProdPad service to the TFS username field
- Click "Create Integration"
- Next select the collection your project is in
- Now select which project you want to map to
- Select the type of work items to map to ProdPad Ideas and User stories i.e. Ideas = Epics, User Stories = User Stories
- Select which ProdPad fields are mapped to work item fields
- Finally, select which ProdPad statuses map to the states in ADO Server
Important!
All fields in ADO must be text or HTML only in order for the integration to work as expected. We do not support other field types. To verify your field type, please refer to this Microsoft resource.
The integration is now set up and ready to use. You’ll be able to push ideas or user stories to the ADO server from the idea canvas.
Notes on Usage:
- The workitems will be created in ADOwith the "created by" set to the user that the ProdPad User Key matches. Each person that is going to integrate ProdPad with ADO in your team will need their own ProdPad User Key
- An admin can create a ADO integration and make it teamwide. Others can then copy this integration, enter their own details (ProdPad Key & ProdPad User Key) and create a new integration with the same mapping as the one that was set up by the admin.
- The admin must have access to the entire project directly or via a group. This could be either being added as a direct member for the project or being added to the “project administrators” group or “contributors” group.
- The API port is the port that the TFS ProdPad service will listen to for data from ProdPad. This port will need to be accessible from the public internet in order for ProdPad to communicate with TFS ProdPad service
- The API port number doesn’t matter as long as it is not being used by another application.
- The URL to enter for the integration in ProdPad is the publicly accessible URL with the port number that you entered above
Setting Permissions for Proxy Account
In order for impersonation to work, the proxy account needs to have permission to make requests of behalf of another user. To set this permission follow these steps:
- Go to the "Team Foundation Server Administrative Console"
- Select the Team Project Collections
- Select Administer Security
- Under Global Security, add the Proxy account
- Select the proxy account and check the "make requests on behalf of others" option.

Troubleshooting
- Ensure that the API port is open to the public internet and no other application is using that port
- If you get an Unknown SSL error then make sure the API port is properly bound.
- Ensure that the SSL certificate being used is not self-signed
- If using impersonation, ensure the proxy account has the permission "make requests of behalf of others"
SSL, Port Binding for TFS ProdPad service
For Secure Sockets Layer (SSL) communications, an HTTP server must have a certificate registered for each socket (IP address/port combination) that it is enabling for use with SSL.
1) Enable port binding
This command will enable “everyone” on this server to bind and listen on port 9000.
- open Command Prompt as Administrator
- type in: netsh http add urlacl url=https://+:9000/ user=\Everyone
Note: Replace the port number (9000) with the port number that you wish to use for ProdPad API.
Note: If you are transitioning from HTTP to HTTPS then you will need to remove the current port binding by running the following command before running the command above:
- netsh http delete urlacl url=http://+:9000/
2) Import server certificate
Next, you need to import a server certificate that will be used to provide SSL transport. If such certificate already exists, verify that it is trusted by the server itself, that it is not expired, and that the server has corresponding private key. Verifying that certificate is trusted is especially important if you are using self-signed certificates.
To import a certificate:
- Open MMC, then go to File – Add/Remove snap-in – select and add Certificates snap-in – when prompted, select Computer Account and then Local Computer
- Expand Personal certificate store
- Right-click on the Personal certificate store, click All Tasks – Import
- Go through the wizard and make sure to select the following options:
- Make private key exportable = no
- Automatically select store locations for certificates = yes
- Once the certificate is imported, double click on it and confirm that it is trusted, that private key is in the store, and that it is not expired
3) Configure port binding to use SSL certificate
Run the following command to add server certificate to your port listener:
netsh http add sslcert ipport=0.0.0.0:9000 certhash=1dca86867481b22c8f15a134df62af649cc3343a clientcertnegotiation=enable appid={02639d71-0935-35e8-9d1b-9dd1a2a34627}
Note that in this command we specify certificate hash value as a HEX string without spaces. This is our certificate’s thumbprint value. Apply any random GUID to AppId
WAN Address did not succeed error
The WAN tab gets the host's public address (public IP) with help of external "whatsmyip" service. It then adds the port number to it and tries to connect. If it fails (page not found or similar) then the host can not be reached through the public IP found by external service (for reasons like firewall rules, router not forwarding port to API host, etc).
You can also manually check it by entering http(s)://yourIP:port/collections in the the browser and see if you get a response!
You only need to check the “Is Https” option on the general settings if a certificate has been applied. Otherwise, leave that option unchecked.